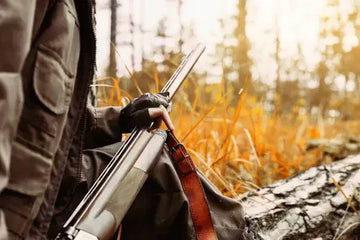
A rifle sling is a piece of gear that does much more than just let you carry your firearm. When used correctly, it enhances safety, reduces fatigue, and can significantly improve shooting stability. Proper attachment and adjustment are key to unlocking these benefits.
This guide provides clear, step-by-step instructions for setting up the most common types of tactical slings.
Benefits of a Rifle Sling
Before we dive in, let’s talk about why you need a rifle sling in the first place. It’s a tool that:
-
Frees up your hands: Carry your rifle securely while you navigate rough terrain or use binoculars.
-
Improves stability: A properly adjusted sling helps steady your aim when shooting.
-
Prevents fatigue: Reduces arm and shoulder strain on long hunts or patrols.
- Enhances safety: Keeps your rifle securely attached, preventing accidental drops.
With that in mind, let’s find the perfect sling for you and get it set up correctly.
Types of Rifle Slings: Choosing the Right One
The first step is selecting a sling that matches your primary activity. The three main designs are:
- Single-Point Sling: Attaches to a single point on the rifle's receiver, allowing for easy transition between strong and support shoulders. Ideal for dynamic, close-quarters situations, but offers less stability for precision shooting and can let the rifle swing freely when released.
- Two-Point Sling: The most versatile and common type. It attaches at two points (typically the stock and the handguard), providing excellent stability for carrying and shooting. It is the preferred choice for hunting, patrol, and general-purpose use.
- Three-Point Sling: Uses a more complex strap system that wraps around the shooter's body and attaches to the rifle in two or three places. It offers very high weapon retention but can be slower to get into a shooting position and is less popular than more modern two-point designs.
A Step-by-Step Guide to Sling Attachment and Adjustment
Step 1: Gather Your Tools and Hardware
You'll need:
- Your rifle
- The sling
- Necessary mounting hardware (often included with the sling): This may include sling swivels, QD (quick-detach) mounts, or M-LOK/Picatinny adapters.
Step 2: Attach the Sling to the Rifle
The method varies by sling type. Ensure all connections are secure and can swivel freely to prevent twisting.
For a Two-Point Sling:
- Identify the front and rear attachment points on your rifle. These are often swivel studs on the stock and handguard.
- Connect one end of the sling to the rear swivel stud (on the stock).
- Connect the other end to the front swivel stud (on the handguard or barrel band).
For a Single-Point Sling:
- Locate a single attachment point near the rifle's receiver endplate or on the stock.
- Connect the sling's single clip to this point.
For a Three-Point Sling:
Follow the manufacturer's specific instructions, as designs vary. Typically, one end attaches to the stock, the main loop goes over your head and arm, and a sliding mechanism connects to the front of the rifle.

Summary Chart
| Sling Type | Attachment Points | Best For |
| Single-Point | Near the receiver | Quick shoulder switches |
| Two-Point | Stock and barrel | Stability and versatility |
| Three-Point | Stock, barrel, and near receiver | Weapon retention and support |
Step 3: Adjust the Sling for Carrying
The goal is a comfortable, secure carry position that doesn't impede movement.
- Loosen the sling's adjustment mechanism (usually a ladder-lock or sliding buckle).
- Slip the sling over your head and shoulder.
- Adjust the length so the rifle sits snugly against your body, whether on your back or chest. It should not hang too low or bounce excessively when you move.
Step 4: Adjust the Sling for Shooting Stability
This is the "fighting" or "firing" position adjustment, crucial for two-point slings.
- With the sling on your support-side shoulder, place your support arm through the sling so it wraps around your upper arm.
- Extend your arm into a firing position. The sling should be tight enough to provide backward tension, pulling the rifle firmly into your shoulder.
- Fine-tune the length for this specific tension. Many modern two-point slings have a quick-adjust feature for this purpose.
Step 5: Perform a Function Check
Before heading into the field, test your setup:
- Security Check: Firmly tug on the sling to ensure all connections are locked.
- Mobility Test: Practice bringing the rifle from a carry position to your shoulder smoothly and quickly.
- Comfort Check: Walk around and assume different shooting positions to ensure the sling doesn't chafe or snag.
Rifle Sling Maintenance and Care
Regular maintenance of your sling helps it remain in good condition.
- Regular Inspection: Check for frayed stitching, worn webbing, and corroded or damaged metal hardware before and after each use.
- Cleaning: Wipe down nylon slings with a damp cloth. For deeper cleans, use mild soap and water, then air dry. Avoid harsh chemicals.
-
Hardware Check: Ensure QD mounts spring back properly and that swivels rotate without sticking.
- Manage excess strap: Use sling keepers or elastic bands to secure loose webbing, preventing snagging and keeping your sling tidy.
Here’s a full guide to maintaining tactical gear.
Conclusion: Mastering Your Rifle Sling
A well-attached and properly adjusted sling transforms your rifle from a handheld tool into an integrated system. Taking the time to set it up correctly will enhance your safety, comfort, and effectiveness in the field. Remember that every shooter is different—don't hesitate to add aftermarket padding or make other comfort modifications to ensure your sling works for your specific needs during extended use.
Looking for a Reliable Tactical Sling Manufacturer?
As experts in the design and manufacturing of tactical gear, we understand the role a durable, well-functioning sling plays. We specialize in the customization and bulk production of high-quality rifle slings for distributors, brands, and security organizations.
If your business requires reliable tactical slings built to precise specifications, we are here to partner with you.
Inquire About Custom & Wholesale Slings
Related Article: Single-Point vs. Two-Point Slings: Pros, Cons, and Best Uses